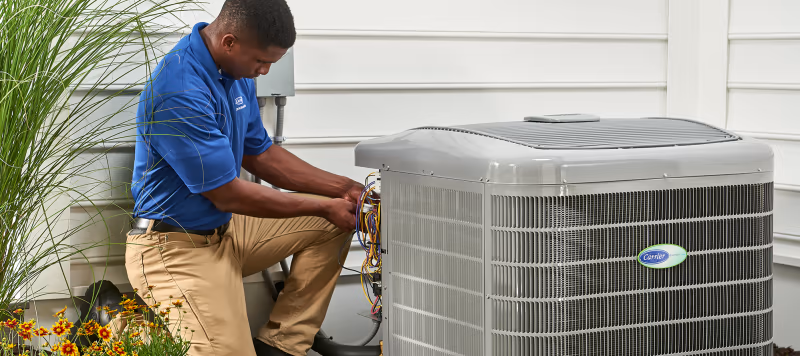
Getting Ready for Servicing:
To guarantee efficiency and safety, it is essential to be well-prepared before servicing a Carrier air conditioner. To start, turn off the unit’s power supply to prevent electrical dangers. Find the interior air handling unit (AHU) and outdoor condenser unit, and collect the required equipment, including a vacuum, coil cleaner, fin comb, soft cloth, cleaning brush, and screwdriver. Make sure you have access to the user handbook from the manufacturer, which contains detailed information on your Carrier model.
Air Filter Cleaning:
Air filters are essential for preserving an air conditioner’s effectiveness and air purity. These filters gather dust and debris over time, which lowers airflow and makes the system work harder. To make the air filters cleaner:
- To access the filters, open the indoor unit’s front panel.
- Examine the filters for dust buildup after carefully removing them.
- Use a mild detergent and warm water to clean the filters. To get rid of tough dirt from extremely contaminated filters, use a soft brush.
- Before reinstalling the filters in the unit, make sure they are completely dry and rinsed.
Clean filters improve indoor air quality and cooling efficiency.
Examining and Cleaning the Coils in the Evaporator:
The indoor unit’s evaporator coils are in charge of drawing heat from the surrounding air. Your Carrier air conditioner’s cooling efficiency may be hampered by dirty coils. To make the coils cleaner:
- Find the evaporator coils by opening the interior unit.
- To get rid of surface dust, use a soft brush or a vacuum attachment.
- To get rid of tough dirt, use a coil cleaner spray and let it sit for the suggested amount of time.
- For a deeper clean, use a low-pressure water spray or gently wipe the coils with a fresh cloth.
Evaporator coils that have been cleaned properly aid in preserving steady cooling and avoiding ice buildup.
The Condenser Unit’s Maintenance:
Heat from the refrigerant is released by the outdoor condenser unit. Effective heat exchange is ensured by routine cleaning of this component. To service the condenser unit, take the following actions:
- Clear the area surrounding the condenser of any debris, including dirt, leaves, and grass clippings.
- To clean the condenser fins, use a garden hose set to gently spray. To force trash away from the unit, spray from the inside out.
- Use a fin comb to straighten bent fins and check for damage.
- Rinse well after using a coil cleaner to clean the condenser coils.
- Use a moist towel to wipe the fan blades clean and check for dirt.
Maintaining a clean condenser unit maximizes cooling effectiveness and prolongs system life.
Checking the Levels of Refrigerant:
The cooling process requires refrigerant. Low levels of refrigerant might result in inefficient cooling and higher energy usage. To verify the amount of refrigerant:
- Look for obvious indications of leakage in the refrigerant lines, such as frost accumulation or oil spots.
- If you possess the requisite knowledge, measure the refrigerant pressure using a manifold gauge.
- For repairs and recharging, get in touch with a certified HVAC specialist if refrigerant levels are low or a leak is detected.
To adhere to environmental rules, handling refrigerants necessitates certain training and certification.
Analysing Electrical Connections:
Poor electrical connections may cause a device to malfunction or break. To examine the electrical parts:
- Look for indications of corrosion, wear, or loose connections on the wire and control box.
- If required, replace any damaged wires and tighten any loose connections.
- Examine the state of the relays and capacitors, which are essential for turning on the compressor and fan.
- Ensure that the electrical components’ voltage and current levels match the manufacturer’s standards by testing them with a multimeter.
The lifespan of the system is increased and operational faults are avoided with properly maintained electrical connections.
System Performance Testing:
It’s time to evaluate your Carrier air conditioner’s performance once every component has been cleaned and inspected. Turn the system on after reconnecting the power supply. Take note of the following:
- Cooling Efficiency: Verify that the vents’ air is cool and dispersed uniformly.
- Noise Levels: Keep an ear out for any odd sounds coming from the outdoor or indoor units, since these could be signs of mechanical problems.
- Airflow: Make sure the indoor unit has a robust and steady airflow.
- Thermostat Function: Confirm that the temperature is precisely maintained by the thermostat.
The system is tested to make sure all parts are operating as intended and to find any lingering problems.
Schedule Professional Servicing:
Maintaining your Carrier air conditioner requires both routine do-it-yourself maintenance and scheduling expert maintenance at least once a year. HVAC specialists are equipped with the knowledge and resources necessary to perform thorough examinations, clean interior parts, and manage challenging repairs. Professional servicing fixes problems that might not be apparent during routine maintenance and guarantees adherence to warranty conditions.
Frequently Asked Questions:
1. How Do Air Conditioners Operate?
For air conditioners to function, heat and humidity must be removed from inside areas and replaced with cooler air. The system uses a refrigerant, which transfers heat from the interior of your house to the exterior. Crucial parts including the compressor, fans, condenser coil, and evaporator coil enable this cycle. Your interior space gets more pleasant and cool as a result of this process.
2. How Long Do Air Conditioners Last?
The type and degree of maintenance determine how long an air conditioner lasts. Split and central systems have a lifespan of 12–15 years, although window and portable units usually last 8–10 years. With the right maintenance, ductless mini-splits can last up to 20 years. Your air conditioner’s lifespan can be increased with prompt repairs and routine maintenance.

